
I had a chance to play this last Friday against a friend of mine by the name of John. He is one of the coolest guys I have met in the gaming world in quite awhile. He is a really good 40k general. He is also pretty good at Fantasy, if you think that 6th place nationally in the Fantasy ‘Ard Boyz last year is good. I had met and played him once before with my pdf Blood Angels, and it was a hard fought game. I barely came out on top in VP’s after we tied on objectives. It was the toughest game I had ever played of 40k. And he had a fluffier list with his Wolves, lol.
So I called him up and asked if he wanted a game, and told him to bring me a tough list to face. He obliged and brought a decent list to smash my face.
I brought my Descent of Angels list to playtest it some more.
Space Wolves List:
Ragnar Blackmane with a squad of 10 Grey Hunters in a LR Crusader. Pfist and 2x meltas
Land Raider with Las sponsons and a 10 man squad of Grey hunters with pfist and 2x melta
5 man squad of Grey Hunters with melta in a TL-las Razorback.
6 man scout squad with melta and a plasma pistol
4 man Long Fangs with 2x lascannons and a plasma cannon
2 speeders, one with multi-melta, and one with multi-melta and Typhoon ML
We rolled for mission and deployment and got 2 objective game with Dawn of War deployment.
He won the die roll and passed me first turn. I told him I was reserving everything and deepstriking it, to which he replied he was reserving all also. Well, I was beaten at my own game. He was smart enough to reserve it all to take away my alpha-strike, and truth be told, it ruined my whole game for me. Ruined my game in that I am new enough to this army to not know immediately how to deal with this type of deployment, and because of that, I lost the game. Now that the cat is out of the bag, let’s proceed with how things went down.
Turn 1
Nothing happens, we are all in reserve.
Turn 2
I got about 4 squads to drop this round, although I wanted none of them to come down. I placed them foolishly quite frankly. I placed one combat squad back on my objective, and some over to the right hand side of the board near some ruins to run into for cover. Melta squad with Priest and Libby drop on his board edge, along with a squad of Vanguard Vets. Stupid placement and bad deployment, we will go over this at the end of the report. Here is how that looked.
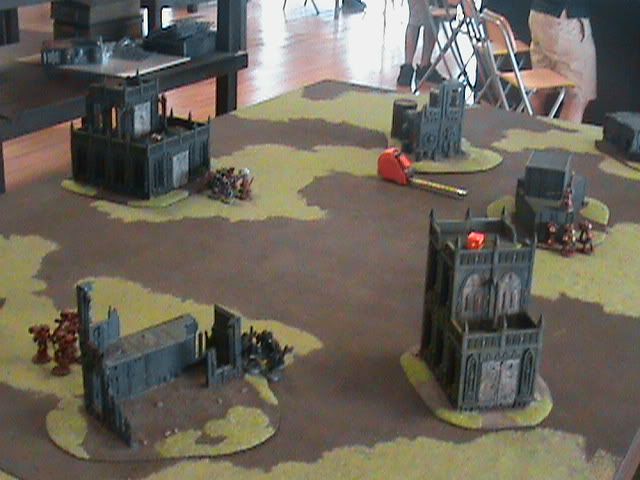 I have one unit hiding on the far side of the building at the top-left of the pic
His part of the turn saw the razorback and 2 speeders hit the table. His scout squad also sneaks on the board right behind my objective. Razorback kills one marine from the Libby squad, Typhoon speeder kills another marine from the same squad, and other speeder whiffs with the melta. The scouts kill 2 marines in shooting then assault me and kill the remainder. What a mess for me. I was not able to make my saves.
Here is how he came on.
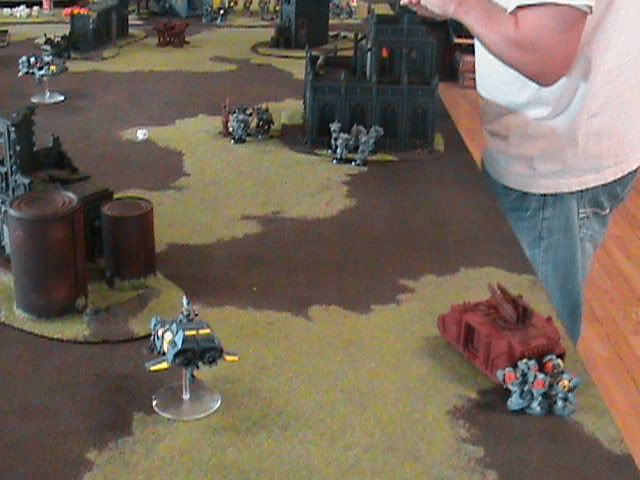 speeder and Razorback
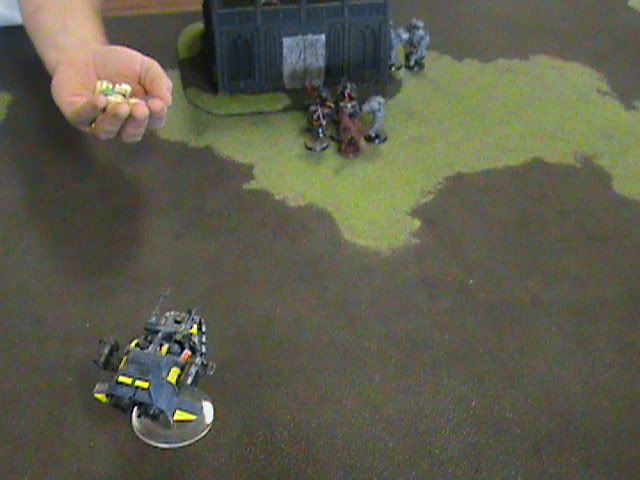 second speeder. you can see my hiding squad now.
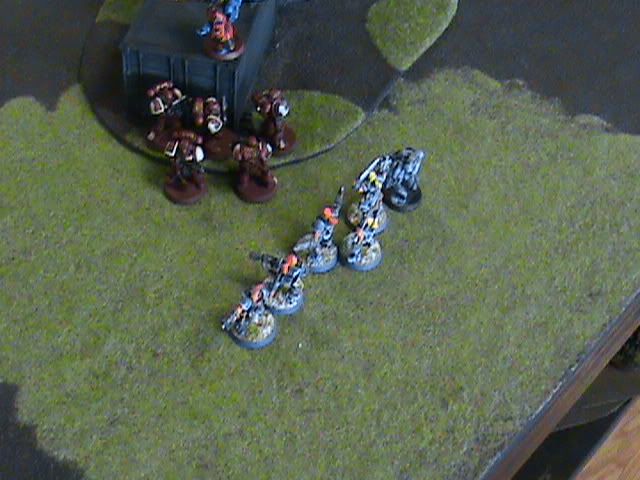 here are the scouts coming on. the model on the container is my objective :)
Turn 3
My other Vanguard squad and Honor Guard come in along with the other Libby/Priest squad. Vanguard in between the Razorback and MM speeder, and the HG mishap and are sent back into reserves. Bad luck, but it could have been worse. Libby lands in front of the speeder near the just landed Vanguard squad. Libby vaporizes the speeder with a blood lance, and the nearby Vanguard roll snake eyes to hit the Razorback with their meltas, after I forget to call a Heroic Intervention with them. What a failure there. The other Libby detaches from his squad and moves towards the other speeder along with a combat squad and an Honor Guard squad. Mistake number about 26. Second Librarian sears a hole in the speeder with a blood lance causing it to explode in a ball of fire. Not too bad I thought. Meanwhile the remaining priest and attached squad run into a building, and the other Vanguard squad climb up to the next level to weather the shooting from next turn.
His part of the turn is the beginning of the end for me. Both Land Raiders roll on and promptly smash my face. Ragnar’s Raider heads for the building with 2 squads in it, and the other raider towards my second Libby Squad.
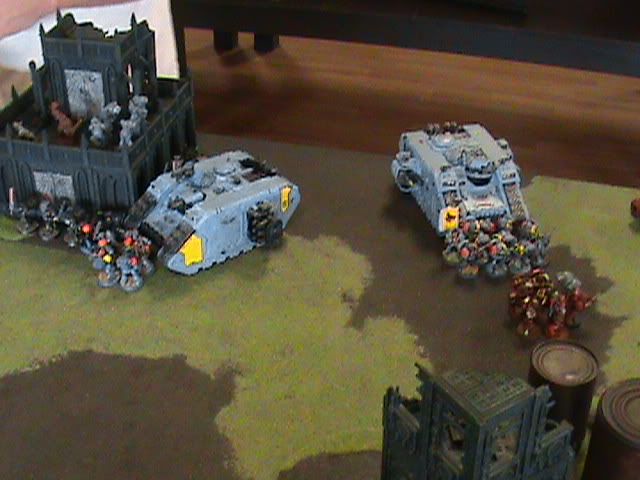
His Long Fangs also march onto the board to the left of the building housing my 2 squads. Shooting phase was bad. The crusader melts the lone Libby into a mound of blue power armor with the multi-melta. The other Raider obliterates one of the marines in the other Libby squad with a well placed lascannon shot. The Razorback spits out its marines and they score 2 bolter wounds on my Vanguard hanging out nearby, and I promptly roll snake eyes with them again. Ugg, 2 dead Vanguard. The Grey Hunters from the Las Raider shoot up my Libby squad and kill one of my marines because I can’t seem to make a FNP save at all. His scouts move away from my objective towards my HG unit and a combat squad. Assault phase is even worse. Ragnar wipes the Priest unit in the basement of the building, and his cronies assault the Vanguard on the top. I lose one Vet, and save his one powerfist wound on a storm shield wielding Veteran. I then smack the cronies around a bit, but still lose combat but pass the test and am stuck in combat. The Libby squad was assaulted and my Libby failed me miserably. The Libby gets pulped by the powerfist, after only killing one marine. My priest survives and I lose combat but stick in there. The scouts assault my combat squad near the speeder wreck and kill a few of them, and I kill a few of his in return with a drawn combat result.
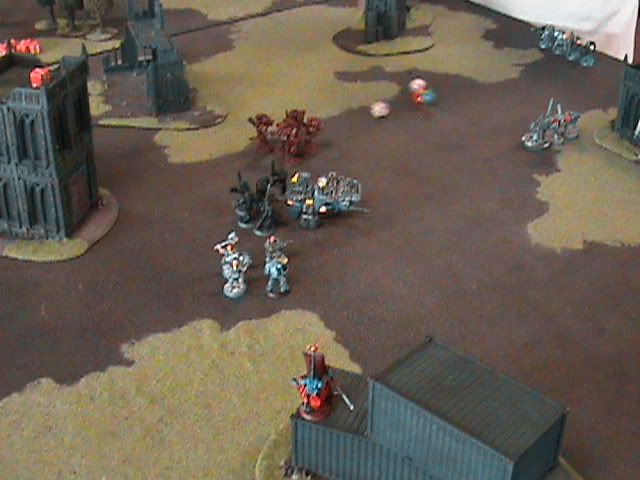
scouts assaulting me near the speeder wreck, and the honor guard coming from behind to help out
I didn't take any pictures after this, it was just too bloody for me, lol. I was too wrapped up in losing to remember my camera.
Turn 4
My Vanguard jump into assault to help the Priest out, ignoring the jerks who just shot them up. The Honor Guard jump in against the scouts to turn the tide there. The second HG squad mishaps again! And this time they try to avoid their battle brethren and smear themselves all over the ground in a really bad landing. Ouch, that one really hurt. I have no shooting to resolve, so we move right into combat. I win both combats with the HG and assault squad combo and the Vanguard and Priest combat. The result being units stuck out in the open ready to be shot up. My Vanguard on top of the building finally die to mass attacks, but they take a few more guys down with them, barely.
His turn is the end of the game essentially. His Long Fangs score a direct hit with a plasma cannon against my Vets that just won combat. Adios to the Veterans. The combat squad loses 2 of the three to shooting also and has to fall back, which is kind of helpful because it brings me closer to my objective. I lose a few more marines to lascannons shots over on the other side of the board, but my Priest is still kicking along with a few other Vets. Ragnar meanwhile has hopped back into his Land Raider and zooms towards my objective.
Turn 5 was just for fun at this point, to see if I could get anything done. My priest shakes the lascannons LR with his infernus pistol and the Vanguard blow up his Razorback with some powerfist love. My last marine jumps over to my objective behind cover, hopefully keeping Ragnar and his LR of death at bay.
His turn has Ragnar getting out of the Land Raider and running through the terrain to get to my last guy. As an aside, he had Ragnar modeled on a terminator base. Is that legal? I ask because it gave him another inch or so out of the front of the LR because of the wider base. He said that was the base the model came with, but after looking on GW’s website, they have Ragnar on a standard base. I’m calling shenanigans. I don’t think he was trying to cheat me, but I think it wasn’t correct. It just gives him way more base coverage to get into CC, and to get into btb with more models. It didn’t change the game on its own because we went to turn 6, but had the game ended, it would have been a draw.
Turn 6 was the last bit of fail as my priest and Veteran powerfist fail again to blow up the LR. I get 3 pens against the tank and they all end up 2’s, every single result. How fitting for this game. One final set of crappy rolls.
So I lost to the Space wolves. I had had such a good winning streak vs crappy lists that I was bound to face a good list piloted by a good general and get stomped on. I was glad it happened, I had become complacent as a player and I really learned from this game.
Here are some of the more important things. First off, I should not have dropped into his deployment zone. Way dumb. He has a good 20” threat radius with those Land Raiders and I just handed him those units by leaving them near his table edge. He entered, shot at me, and assaulted me, and subsequently cleared me out. Second, I should not have detached my Libby early on. Big mistake there too. I just handed him the ideal multi-melta target, and he capitalized on it. Third, with no targets to shoot at, I should have kept my assault squads together, and attached my IC’s to the Honor Guard Units. I should have had a full assault squad on my objective so when the scouts inevitably came for it, I had strength of numbers to beat them down. Fourth, I need to be more careful when deepstriking my units in. I should not have to lose units to mishaps. I have little enough scatter to keep them safe, I just need to estimate distances better, and not try to stick the landing every time. Fifth, I need to let my army units support the others. I look at my deployment after the fact, and it makes me think that I was retarded or something. I have units all over the place and no cohesion at all to my force. I give him individual units piecemeal. Stupid.
This was a good learning experience for me, and will help me with deployment, especially dealing with the jerks that reserve their whole army on me ;) So I have to thank John for pimp slapping me around, and helping me to up my game a little bit. I need to call him again and get some more games again, it was loads of fun!

Good stuff, as in, that you reported eventho it was a loss and you elaborated on what you learned from the game. Bat reps are good for pimping your army out, but it's also a good record to go back to and learn from. And help others that read it side-step pitfalls of deployment and the like. When it comes down to it, it's still a game of dice and rolling lots of 2s is never helpful, lol.
ReplyDeleteThanks for the vote of confidence!
ReplyDeleteI was glad that I lost actually. I had been winning vs under-powered lists, and I felt my game was stagnating. I wanted a tough list to face, so I could see where my weaknesses were.
It was obvious here that I failed in deployment. Even had my dice rolling been hot, it would not have changed a whole lot I don't think. I was outclassed as a general in this game, plain and simple.
Now I just have to learn from it. :)
Nice batrep, tough game. I'm a firm advocate of the idea that every new army needs to be slapped around a few times so the player can see what their weaknesses are, and try to fix them. A pure deep-strike army like yours is going to take a lot of practice to beat tough lists like he took.
ReplyDeleteThe important thing is that you're trying to learn from mistakes. I never learn nearly as much from massacres in my favor than losses. Not that the losses are usually that 'fun', but they ultimately make you into a better general.